Stop motion is a technique in which objects are changed bit by bit between frames. A frame is a single image in a series of images. When multiple frames re played in succession, you’ve got an animation!
We can make digital stop motion in Google Slides. Each slide is a frame in the animation. There are no transitions or motion effects applied in stop motion. The animation is all done by making small changes to what’s on each slide.

You can use images you find online in your animations. Even better, you can use pictures you’ve drawn with shapes.
Why is that better? Because you can manipulate what you’ve drawn to create the animation.
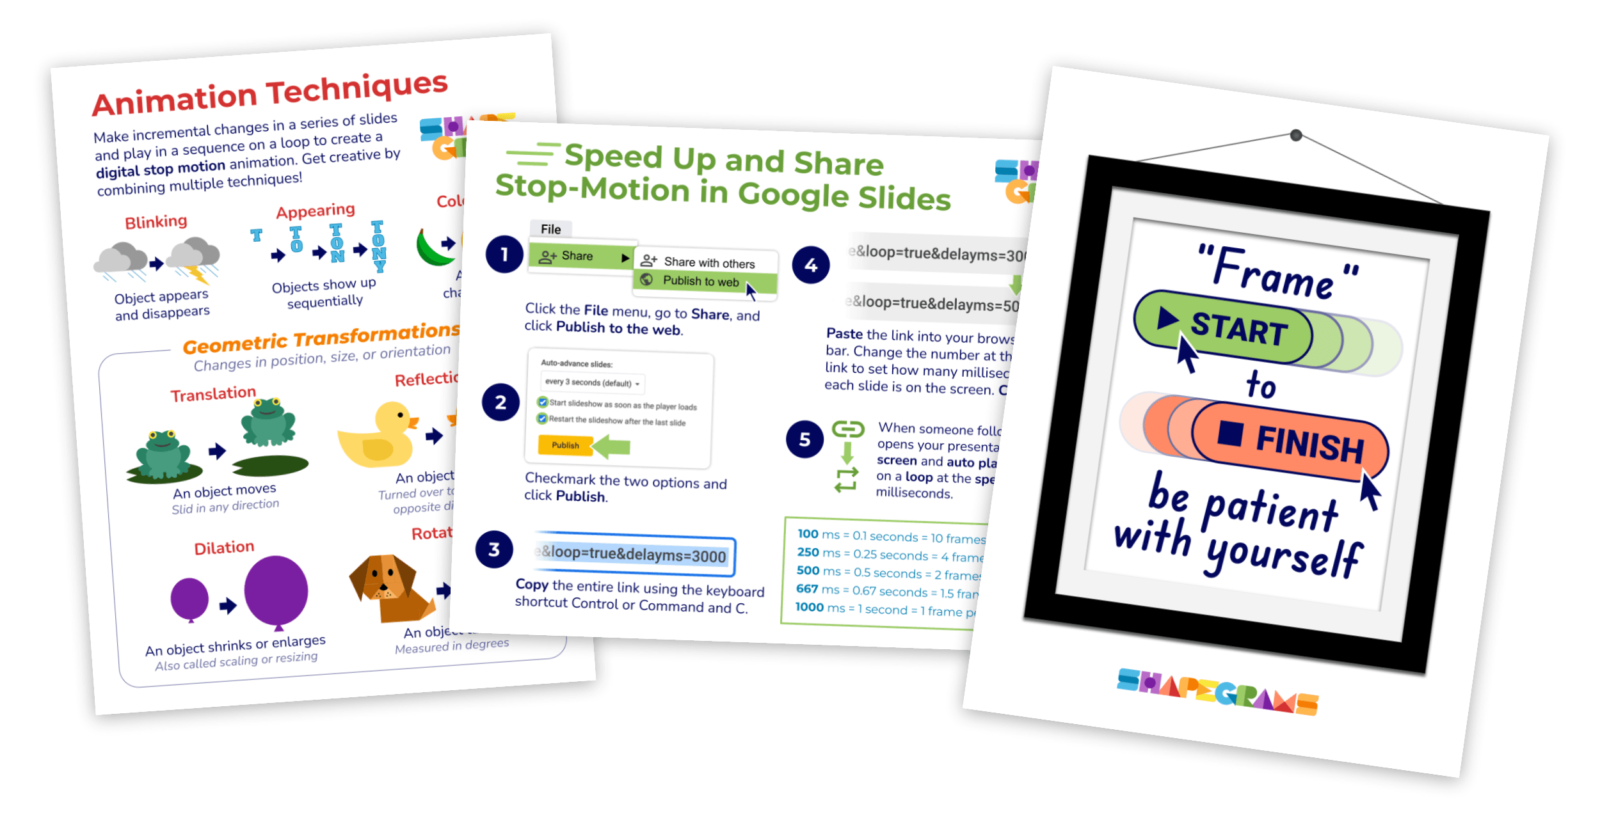
Teachers can give their students the Stop Motion Shapegrams Lesson. The lesson introduces 7 stop-motion animation techniques and encourages students to combine techniques to create an animation that tells a story or communicates content they are learning.
There’s a bunch of math connections in the lesson. Four of the animation techniques involve geometric transformations: translation, reflection, dilation, and rotation. Also, students may need to convert seconds to milliseconds in order to get the timing just right.
The tutorial video in the Stop Motion Lesson is 22 minutes long. It includes:
- Animation techniques
- Auto-playing on a loop
- Changing the timing
- Sharing as a web link
Watch the first three minutes of the video.
Like all Shapegrams Lessons, the Stop Motion Lesson comes with posters. The PDFs can be printed and displayed as a reference. There’s also a punny growth mindset reminder.

The Stop Motion Lesson’s template for students is a little different from other Shapegrams. There’s not a picture to recreate. Instead, the video demonstrates 7 digital stop-motion animation techniques. Students build animations in their own copies of the Google Slides document, using Slide 1 as a reference.

Teachers might give students this same document each time they want their students to show and share their learning with a creative animation.

The Stop Motion Lesson is at the Progressing Purple level. It’s suggested that students go through some of the Beginning Blue and Growing Green lessons before trying the Stop Motion Lesson. The Stop Motion Lesson works best in Grade 4 and up.
The Stop Motion Lesson is included in Shapegrams membership. Membership gets a teacher access to all 100+ Shapegrams, and teachers can then give their students copies of the templates. Become a member for just $35 a year.
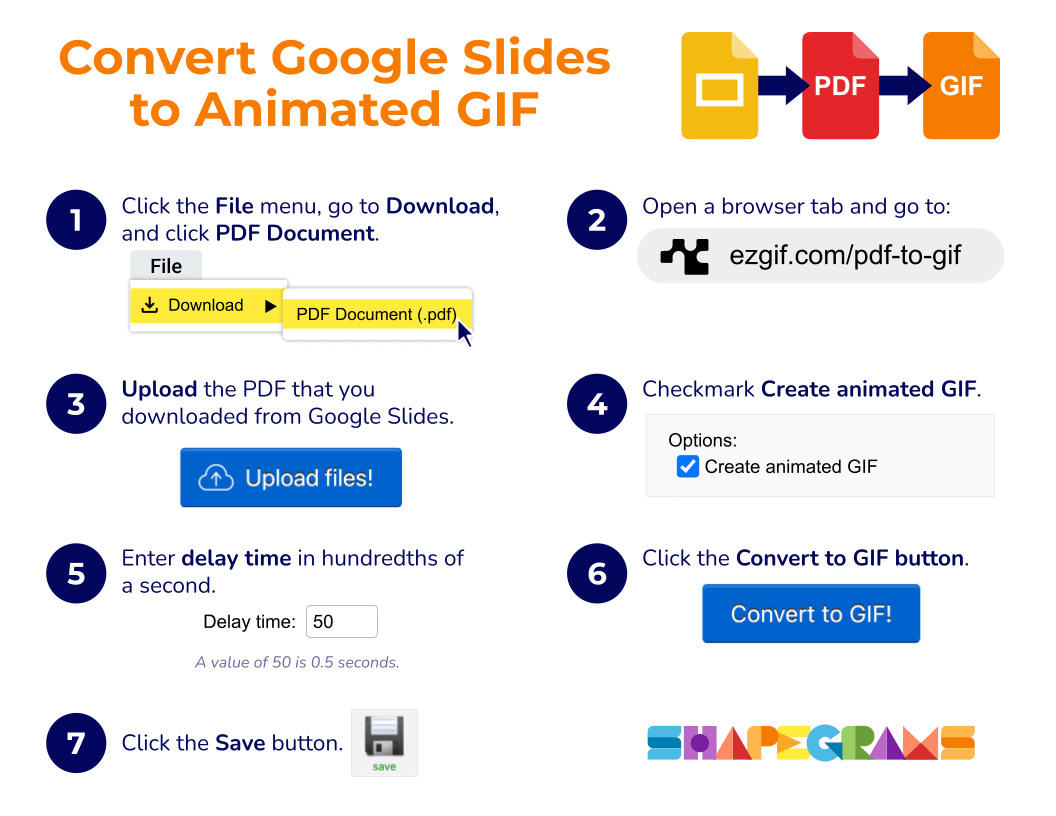
Convert Google Slides to Animated GIF
While it’s not included in the Stop Motion Lesson’s video, many teachers ask about saving stop-motion animations are GIFs. Here’s a good way to turn a series of slides in Google Slides into an animated GIF:
- In Google Slides, go to File, choose Download, and click PDF Document.
- Go to Ezgif’s PDF to GIF page.
- Upload the PDF.
- Checkmark Create animated GIF.
- Set the delay time in hundredths of a second.
- Click the Convert to GIF button.
- Click Save.
After the animation has been saved as a GIF, it can be inserted back into Google Slides, shared in Google Classroom, uploaded to Padlet, posted on social media, or inserted anywhere you can add a GIF.
An animation is a great way for students to share their creative genius!
